TRAP/J 2.2 User Manual

Adding Adaptability to your Application

  1. Once you've installed the TRAP/J plug-in in Eclipse, start Eclipse and right-click on a Java project in the Package Explorer. In the context menu, mouse over the TRAP/J label. A sub-menu will appear with the option "Add TRAP/J Nature." Click on this option to add the TRAP/J Nature to your project.

    Adding the TRAP/J Nature to a project

  2. The following dialog will appear asking you to select a folder where TRAP/J can output its files.

    Select an output directory for TRAP/J

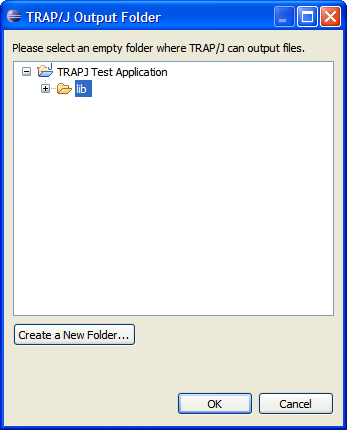
    Please set aside an empty folder for TRAP/J to use exclusively. If there are no empty folders in your project, you can create one using the "Create a New Folder" button. You can name it however you like. Here, in this example, we've selected the folder called "lib" as our TRAP/J output folder. It is very important that you NEVER put any of your own files in the TRAP/J output folder! We cannot guarantee that they'll still be around the next time you look for them!
  3. We are now ready to add adaptability. Find a method you would like to make adaptable and add the @AdaptReady annotation over its signature. Eclipse will probably underline the annotation in red and complain that it can't resolve the type. No problem, we just need to import the annotation. Pressing Ctrl+Shift+O imports the annotation, and removes any unused imports as well.

    Adding the @AdaptReady annotation to a method

  4. Continue decorating methods in your project with the annotation. Keep in mind, though, that main, native, static, and final methods cannot be adapted. There's no harm in annotating such methods: the TRAP/J Builder will just ignore them.
  5. Once you've finished annotating the methods you want to be able to adapt at runtime, click Save or build the project if you have Auto-Building turned off.
« Installing TRAP/J 2.2 Table of Contents
TRAP/J Home
Writing Delegates »